If you are enrolling a large roster of students in BrightFish Reading, you can use the “Import Students” tool to create multiple student accounts at once.
In your Classes tab, click on “Import Students” from your left sidebar menu (under Tools).
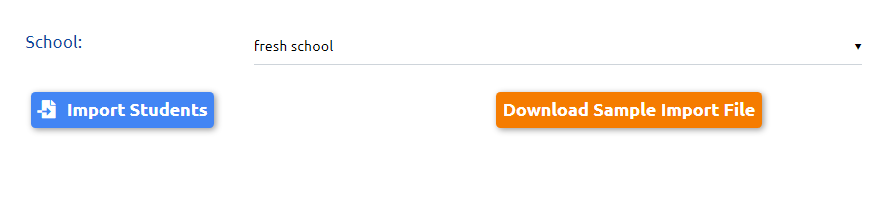
To upload a list, select your school and click “Import Students.”
You can download the template sample with the correct headings for your file.
Upload Data from a File
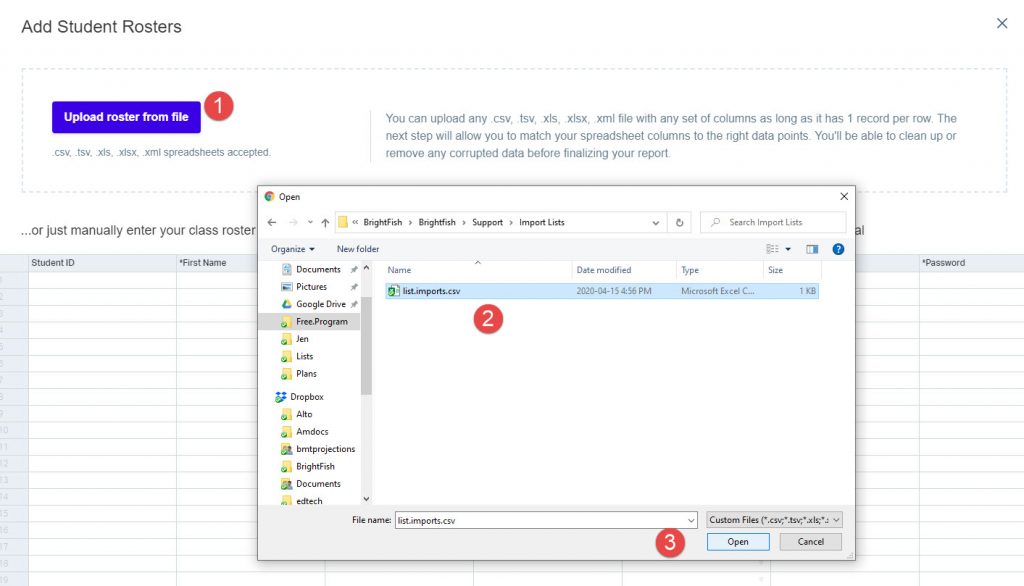
Step 1: Click the button “Upload roster from file.”
Step 2: Select the file you want to use from your computer.
Step 3: Press Open to upload your list.
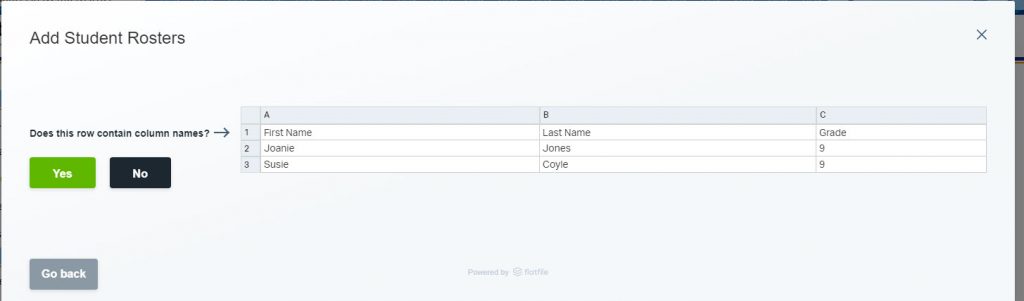
Confirm the columns
If there is data in each of the columns, answer Yes to confirm that the rows have information.
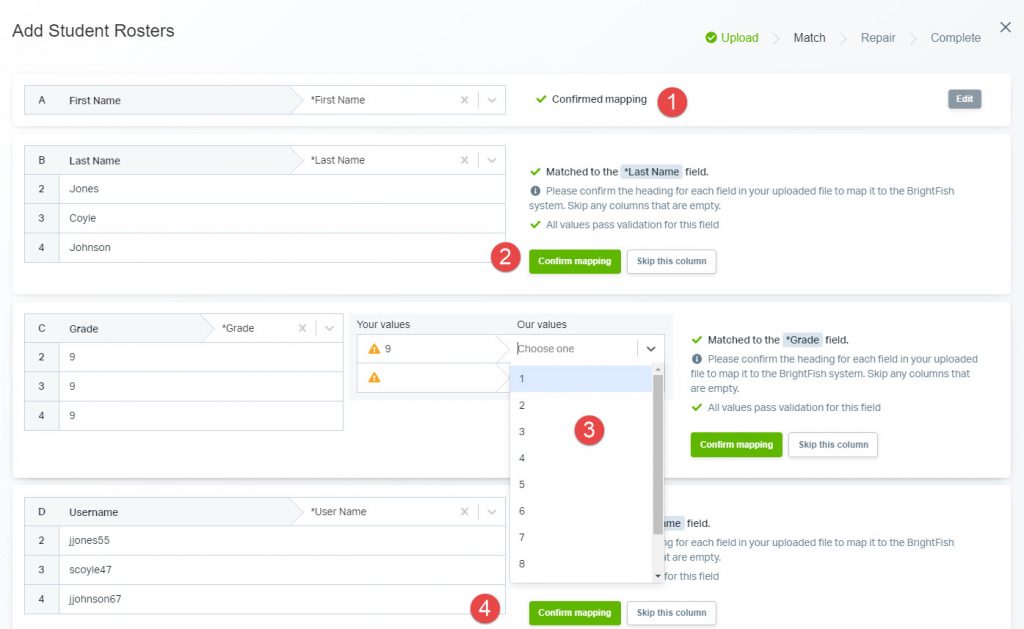
Match your fields
Now, you will need to match your column headings and make changes as needed.
Steps 1 and 2: Click Confirm mapping if the column heading is correct.
Step 3: Make changes as needed – the system will show you if there are changes required.
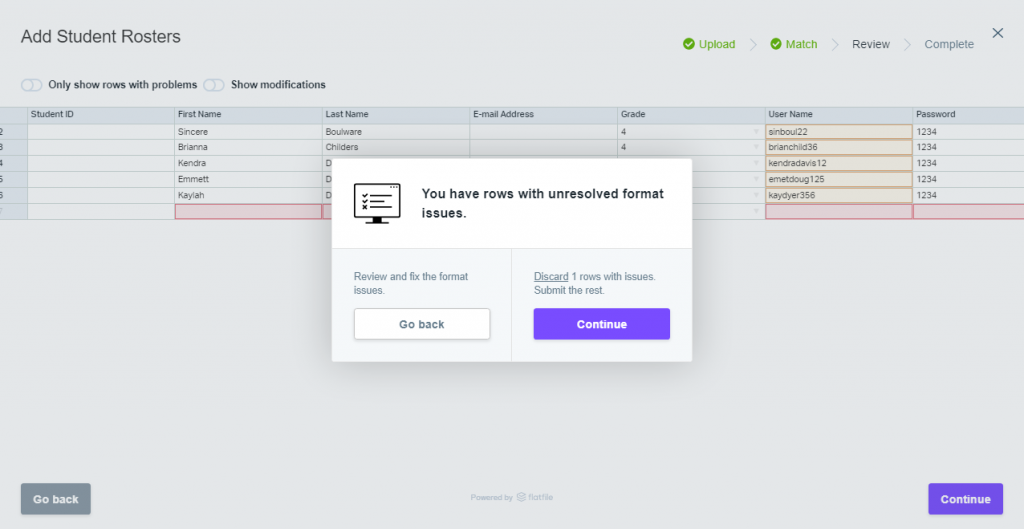
Review your fields and submit
You may have empty rows or duplicate usernames. Those will be highlighted for you. You can choose to go back and edit your list, or continue with your import.
Tip: if the issue is just an empty row, you can ignore that and press continue to submit your list.
You will receive a “Success” message to validate that your list has been enrolled. You can click on your Users tab to see your imported students.
Now, you will assign your students to Classes.